Windows 10 out of the box has a various application that protects your computer viruses, hackers, and a variety of malware. Windows Firewall or Windows Defender Firewall is one out of them. Windows Firewall has been the core component of the Windows operating system from the classic Windows XP to the modern Windows 10. Its job is to protect your computer, important data, and even your identity from various internet threats. The application is enabled with default settings and always runs in the background. No doubt, its handy security component of Windows 10, but not all users rely much on it and keep it inactive, as this prevent any kind of data transfer over internet conection.
How to Turn Off Firewall in Windows 10 (Defender Firewall)
In case, you’re the one who have kept Windows Firewall inactive, then you must aware of how to turn off Windows 10 Firewall. There are two ways you can disable Windows 10 Firewall, here goes the steps for first method:
Disable Windows Firewall using Settings app
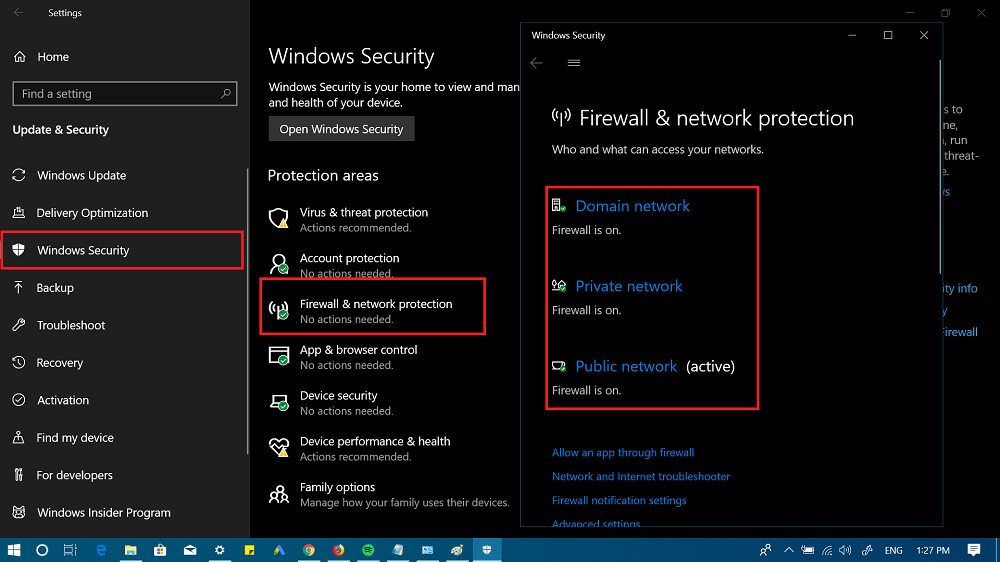
1 . Launch Settings app by pressing WIN + I keyboard combination. 2. Next, head over to Update & Security -> Windows Security (Left pane). On the right side, you will find various options click on Firewall & network protection. This will open the Firewall & network protection window, here you will find three different options:
Domain NetworkPrivate NetworkHome Network
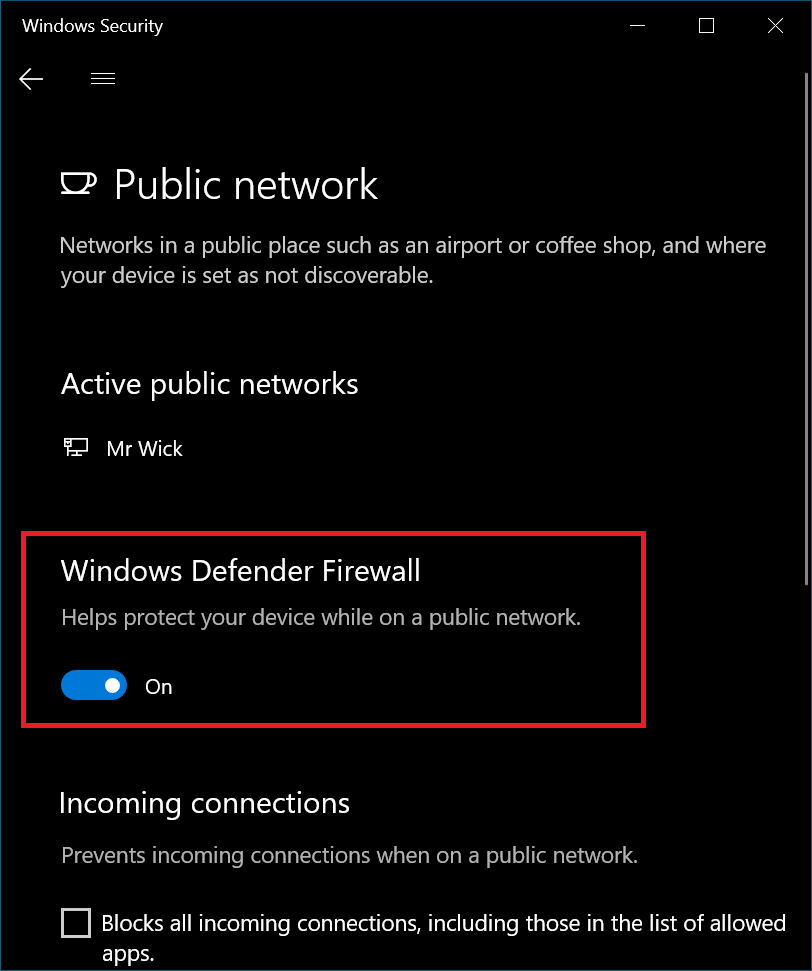
With default settings, Windows Defender Firewall is enabled for all network types, now it’s upto you for which network you want to turn off Firewall in Windows 10. Suppose you want to disable firewall for Home Network, then click on the Home Network link. On the next screen, move the Windows Defender Firewall slider to OFF position. When UAC dialog box open up, click Yes to confirm the action. In case, you want to disable Windows Defender firewall for all network, then follow the same steps. To enable the Windows Defender Firewall, all you have to do is to reverse the steps discussed above.
Turn Off Windows Firewall using Control Panel
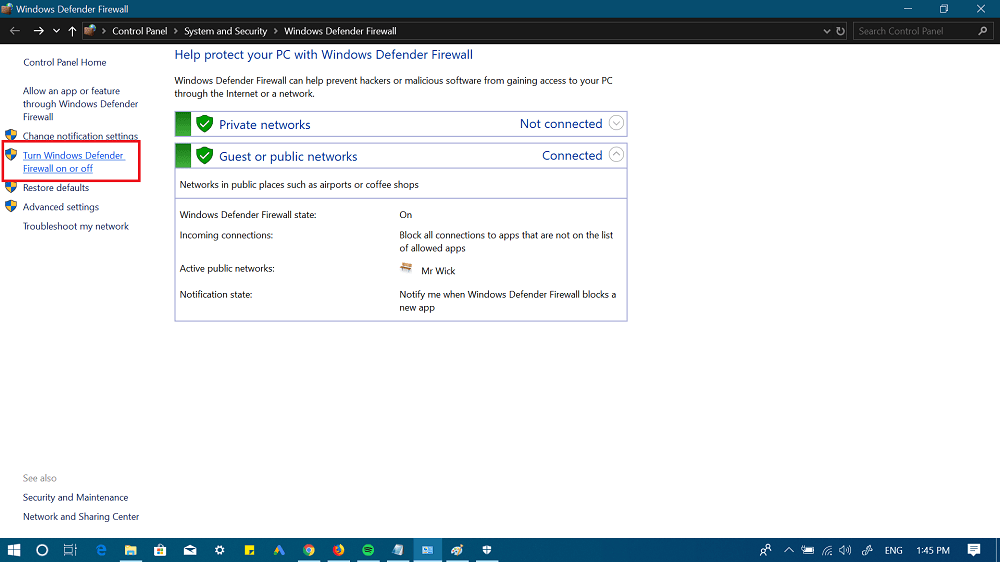
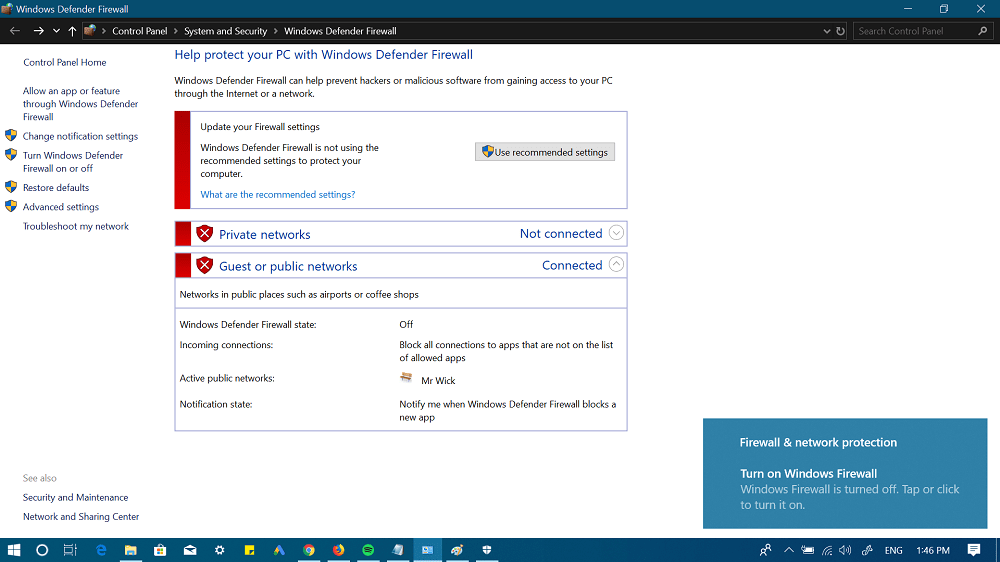
- In Windows 10 Search, type Windows Defender Firewall. When the same result appear in the search result click to open it. This will open the Windows Defender Firewall in the classic control panel.
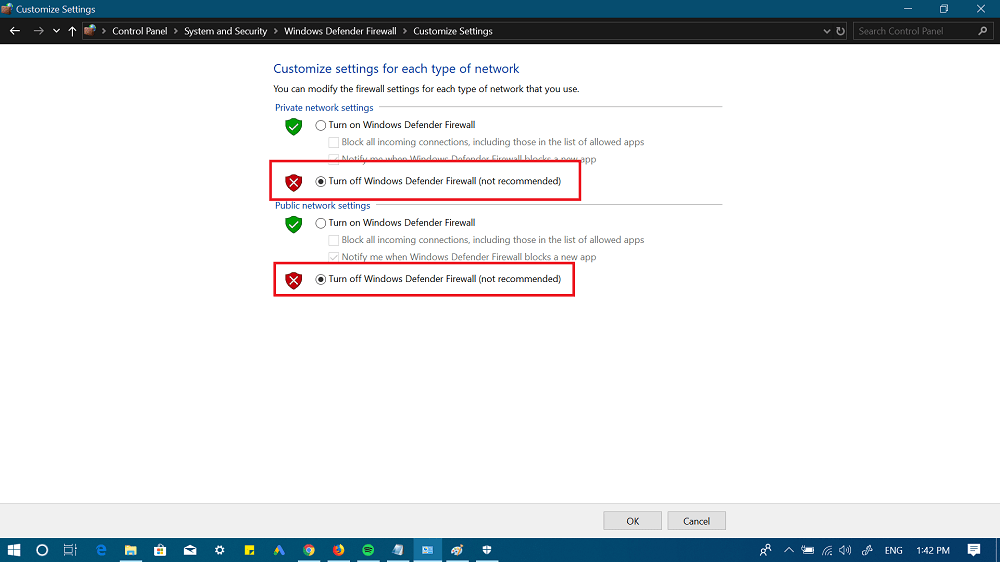
- Here on the left pane, you need to click on the link which reads “Turn Windows Defender Firewall on or off.” This will further show you two different section which includes:
Private network settingsPublic network settings
Under these sections, you will find various options to modify settings. To disable firewall in Windows 10, you need to check the box for option “Turn Off Windows Firewall Defender (Not Recommended)” and click OK. It’s upto you whether you want to disable firewall for Private network or Public network. At any point, if you want to enable firewall in Windows 10, then all you have to do is to click on the “Use recommended settings” listed under “Update your Firewall settings.“ That’s it. I hope you find this blog post on how to disable Windows 10 Firewall handy? I will love to read the feedback in the comments.