Typically, various circumstances can cause device users to experience CPU or Associated Fan problems. Reasons for CPU Fan Error The error can be caused by a variety of factors, such as the user incorrectly entering fan information into the BIOS interface. There are occasions when the CPU Fan runs too slowly owing to dust or poor quality. Aside from that, the CPU fan may not be correctly attached and may be damaged or destroyed, resulting in the error. Overclocking can lead to overheating and can cause CPU Fan Error as well. When the device is not able to discover the connections of the CPU fans or detect the fan speed during normal usage, it is conceivable that the settings have been changed accidentally.
How to Fix CPU Fan Error
Before reading further bookmark this page, and reboot your system, most of the time rebooting the system can sort out this kind of issue. Try to keep your system in a cooler place and check if your CPU error persists! If you are doing Overclocking, then you should stop doing that, as the heat can not be managed by the default fan that overclocked system produces, which can result in CPU fan error.
Remove all Dust & Clean CPU Fan
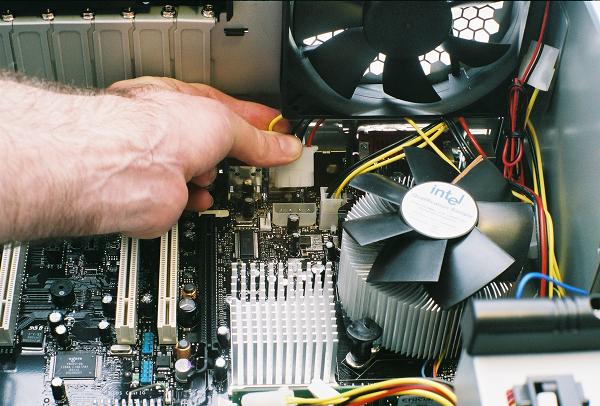
Check if the computer CPU is dusty, if yes then go and completely clean the dirt.To clean the dust from these fans, use conventional methods. You can use a soft brush, or even a spare toothbrush to clean the fan OR you can buy a CPU Fan cleaning kit as well. If you happen to find out a corrupted or broken fan by accident, simply buy a new one on amazon. While doing this, always proceed with caution to avoid further computer component damage, If you don’t know how, you might ask a friend or an expert for assistance in changing your CPU Fan.
Make sure the connections are set up correctly
If your fan is in perfect working order but still will not turn on, examine its connections. As they come with a couple of connection ports on the motherboard so that users may connect many fans at the same time even the ports for other computer components are likewise quite similar to the ports for the host CPU fans. As a result, some users may wrongly install their CPU fans. To get rid of it, disconnect the connections and try combining them with other ports to expand your options.
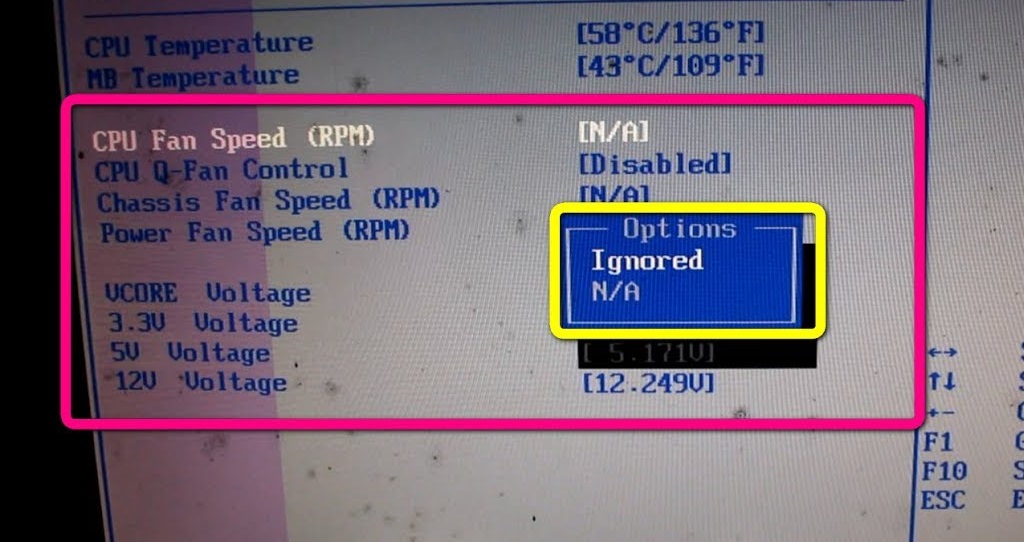
Check System’s BIOS Settings for CPU Fan Error
In order to do that, reboot your device and reopen the BIOS interface to restore the fan’s settings to the default. To begin, take the following steps: Reboot your System, Hit F2, F12, or Del to go to the BIOS setting panel. Now, go to the Power tab and choose Hardware monitor from there. After that, choose CPU FAN SPEED from the options. Set the options to “Ignore” And, change the settings for CHASSIS FAN SPEED to N/A. Choose POWER FAN option, and change SPEED to IGNORED, your CPU Fan error should be resolved by now.
Scan for errors and fix them
By hitting the F10 button the BIOS setup may be inserted. This enables you to process the majority of the device’s hardware operations, including the fan. Modifications to the speed at which your device’s fan operates are possible.The steps are as follows: Go to CPU Fan > Advanced Settings > Hardware Monitor Then, turn on Fan Duct with Fan/Without Fan, Heat Sink Exit the portal after saving all of your modifications. After saving the settings your system will restart.
Final Verdict
The most typical causes of CPU fan error during boot, as we’ve already said, are BIOS settings and dust. Such issues are usually fixed with a simple reboot. However, overclocking or old hardware can be another cause of such problems. While overclocking might damage your chip circuit, if your hardware is outdated and you are not clocking your system, you may need to use more than a fan to cool it down.