Display Stage Manager in Menu Bar on Mac
macOS 13 provides two pretty straightforward ways to display Stage Manager in Mac’s menu bar. While one requires a familiar drag-and-drop gesture, the other requires you to customize the Stage Manager settings. In this guide, I have explained both methods.
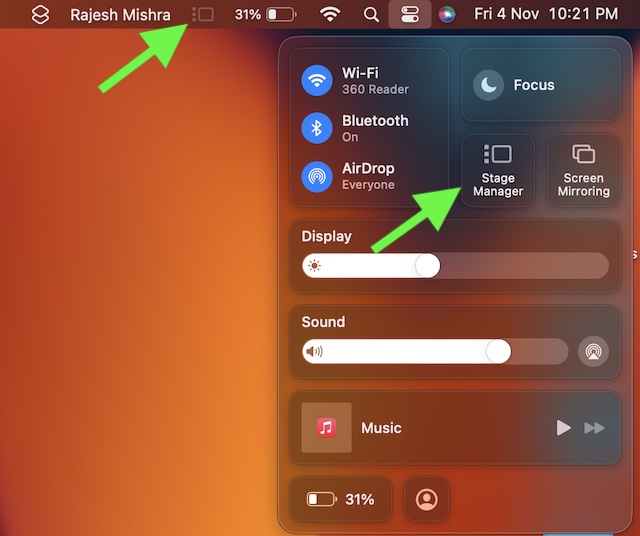
Quick Way to Show Stage Manager Icon in Mac’s Menu Bar
First off, click on the Control Centre icon located at the upper right corner of the screen. Now, drag the Stage Manager icon and drop it at the desired place in the menu bar. And that’s about it!
Standard Way to Display Stage Manager Icon in Mac’s Menu Bar
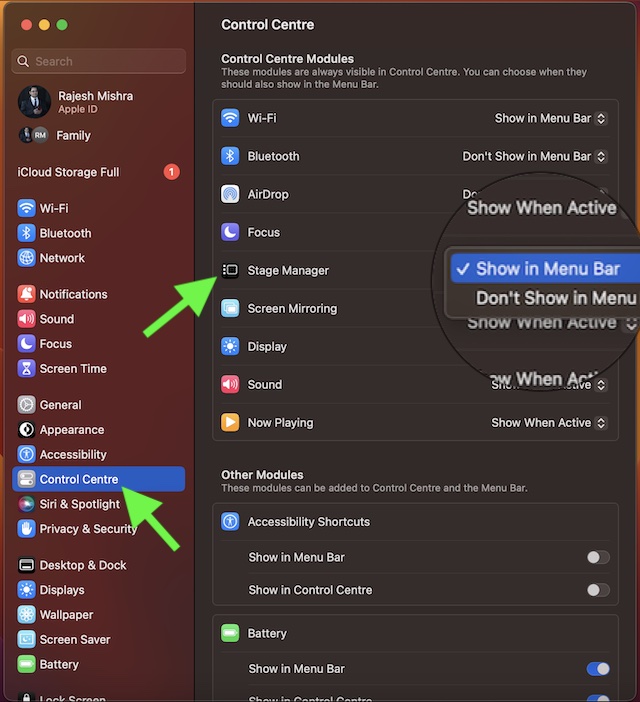
- Open the System Settings app on your Mac. Or, click on the Apple menu at the top left corner of the screen and choose System Settings.
- Now, scroll down and click on the Control Center option.
- Click on the drop-down menu that appears on the right side of Stage Manager.
- Finally, choose Show in Menu Bar and then quit the System Settings. Voila! The Stage Manager Icon will immediately start showing in the menu bar. From now onwards, you can click on this very icon to take control of the windows organizer.
Remove the Stage Manager Icon from Mac’s Menu Bar
Menu Bar has limited space. Hence, you can display only a few icons there. Later, if you ever don’t want to keep the Stage Manager Icon in the menu bar, you can remove it without any hassle. To do so, while pressing the Command key, drag the Stage Manager Icon out of the menu bar and let it go. And that’s pretty much done! The icon will no longer appear in the menu bar.
Wrapping Up…
Though macOS 13 has several impressive features, Stage Manager has won more attention than any other features. And rightly so. What makes it so impressive is the ability to automatically organize your recent apps and windows. Hence, you can easily switch between the apps you are working on. It plays a vital role in boosting your productivity. To help you get the most out of macOS 13 Ventura, we have created several hands-on guides about how to enable fast user-switching, remove background, convert images into other formats, and use iPhone as a webcam on Mac. Make sure to check out these posts, if you couldn’t catch up with them. Also, stay tuned in with us so that you can keep a track of the helpful guides.

